Contact Us
------------------------------------
800-496-4638 EXT4
413-743-7044 EXT4
Monday-Friday, 10am-4pm
support@bcn.net
Berkshire County Network |
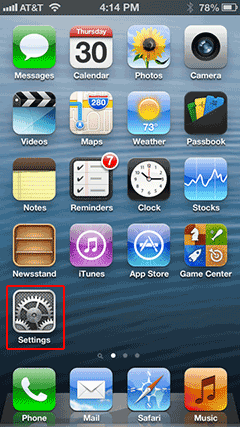
Email Setup on Apple iPhone with iOS 6
This tutorial will show you how to add an email account to your iPhone.
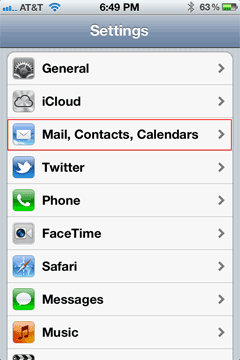
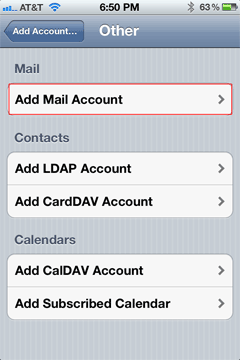
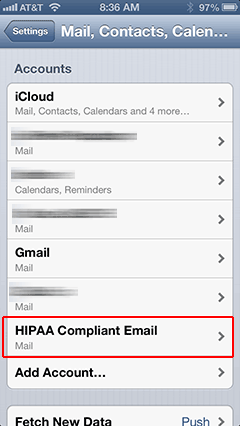
Touch Mail, Contacts, Calendars
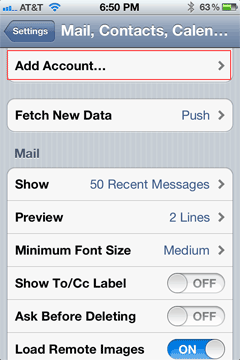
Touch Add Account
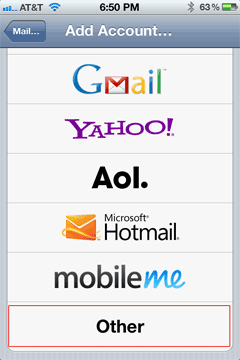
Touch Other
Touch Add Mail Account
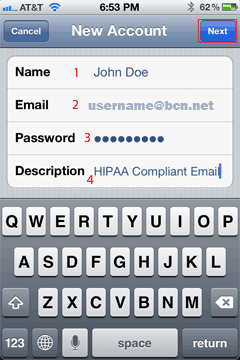
1. Enter your display name (will be shown on outgoing emails) 2. Enter your email address (given to you by your company administrator) 3. Enter your email password (given to you by your company administrator) 4. Name to identify your Email Pros account on your iPhone (it can be anything) 5. Touch Next
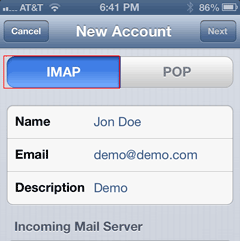
IMAP should already be selected in blue. If not, touch IMAP, not POP.
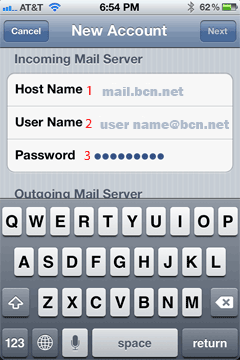
Scroll down to Incoming Mail Server Settings: 1. Enter mail.bcn.net 2. Enter your email address again 3. Your password should already be set, if not enter it again.
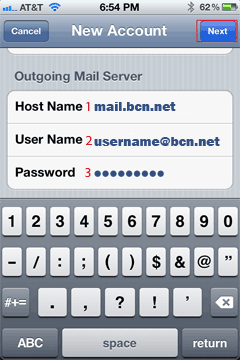
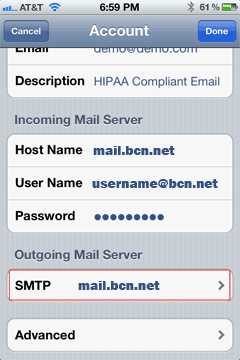
Scroll down to Outgoing Mail Server Settings: 1. Enter mail.bcn.net 2. Enter your email address again 3. Enter your password again 4. Touch Next
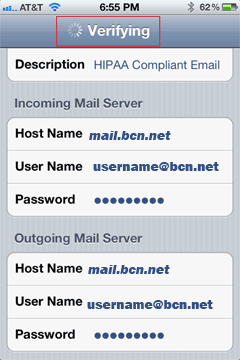
It will take a few minutes to verify, please be patient (YES...IT SEEMS LIKE FOREVER).
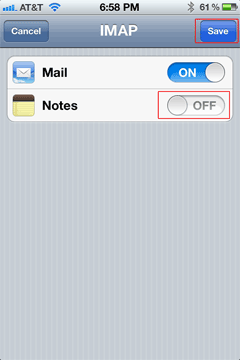
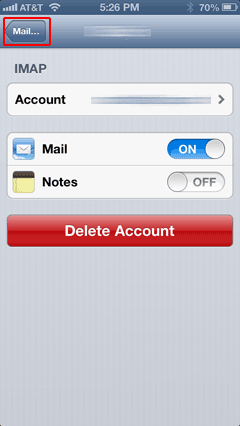
Turn off Notes Touch Save
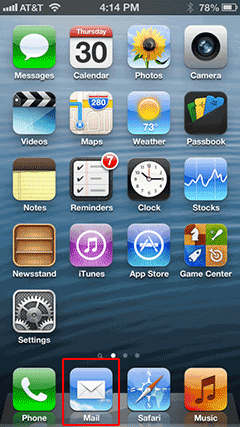
Go back to the home screen
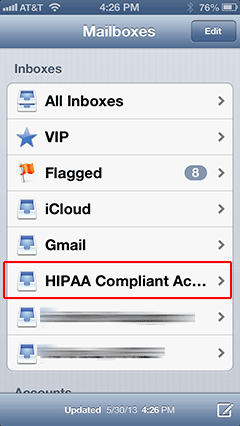
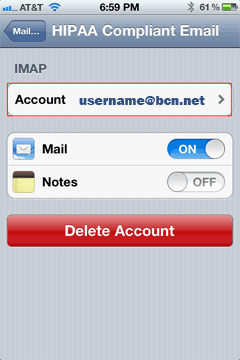
Touch the new email account you just setup It will download all your messages and folders.
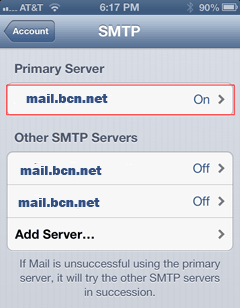
Scroll down and touch SMTP under the Outgoing Mail Server settings.
Under Primary Server, it should display mail.bcn.net and On, touch this to go into its settings.
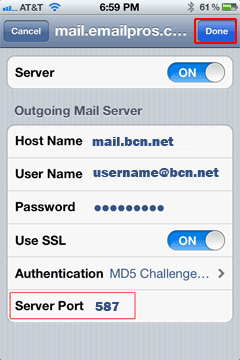
1. Make sure Authentication is set to MD5 Challenge-Response, if not set it 2. Make sure the Server Port is 587, if not change it from 25 to 587 Touch Done. It may verify the account again, please be patient.
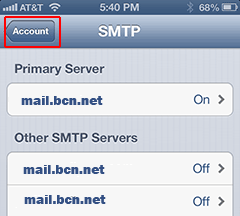
Go back
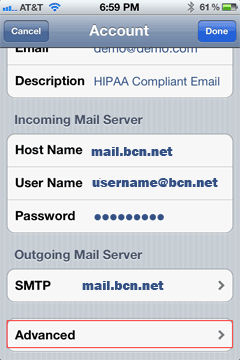
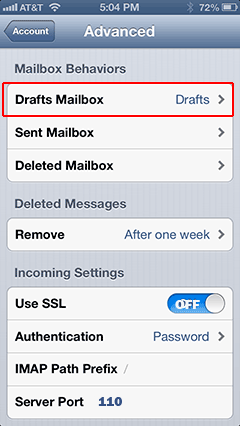
Touch Advanced
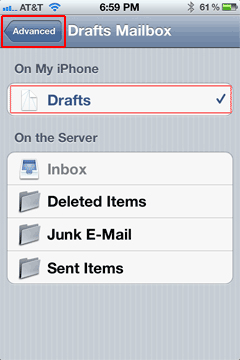
Touch Drafts Mailbox
Touch Drafts under On My iPhone (Tap it even if it's already selected) Go Back
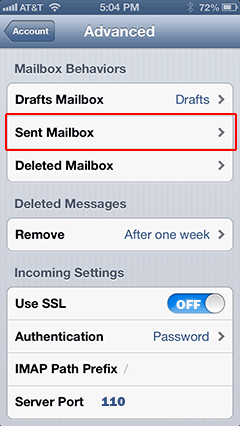
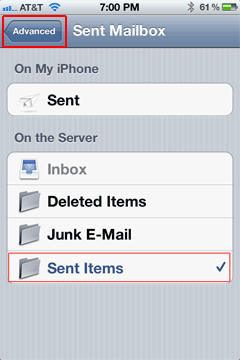
Touch Sent Mailbox
Touch Sent Items under On The Server Go Back
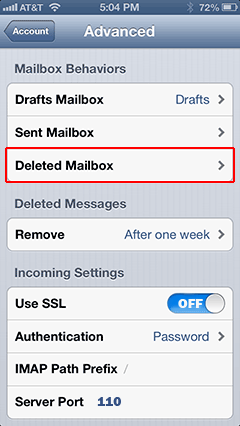
Touch Deleted Mailbox
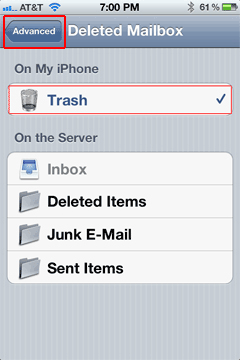
Touch Trash under On My iPhone (Tap it even if it's already selected) Go Back
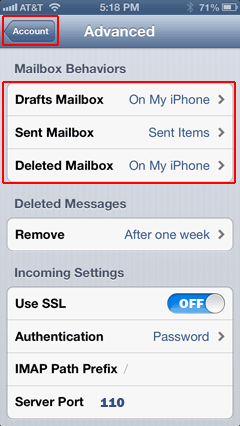
If not, you did not do the last 3 steps correctly, go back and repeat the last 3 steps. If you did everything correctly, go back one screen
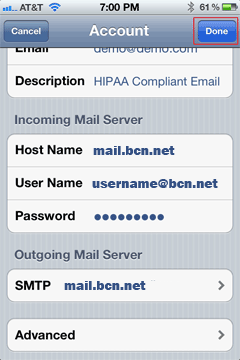
Touch Done
Go Back
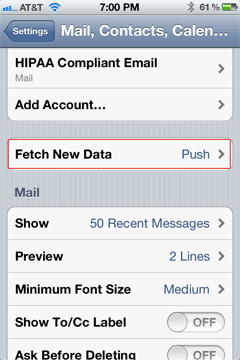
Touch Fetch New Data
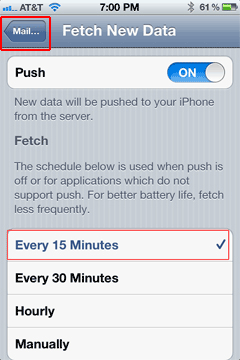
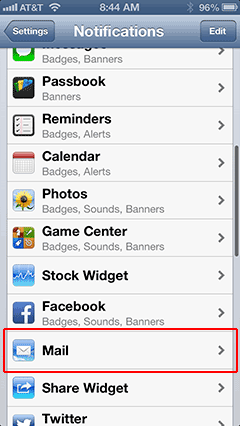
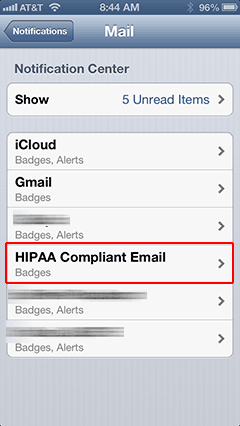
You can select how often to check for new messages, we recommend Every 15 Minutes Go back Go into Settings
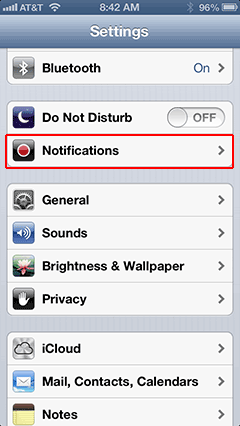
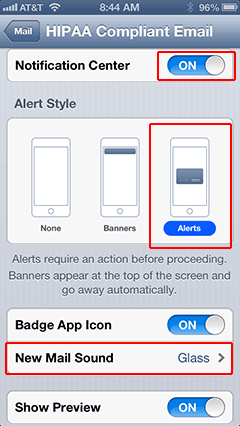
2. Alert Style: Select Alerts
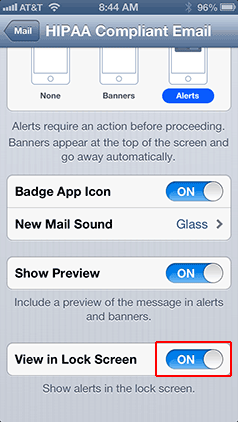
Scroll down Go into Settings
2. Alert Style: Select Alerts
Scroll down |
